
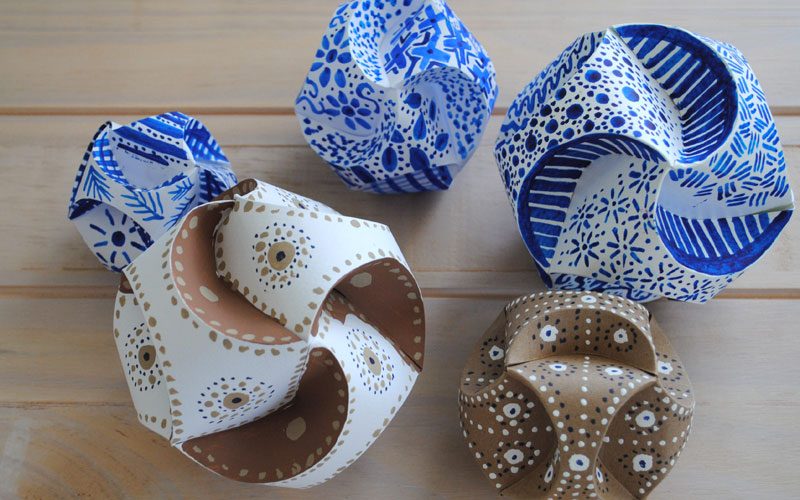
Aren’t these paper orbs just gorgeous! They are not difficult at all to make and require no special crafty supplies. Go and rescue that old corn flake packet out of the bin right now and knock one of these babies up in a matter of minutes.
Here is what you will need.
- Craft knife or scissors
- A scoring tool, you don’t need anything special, I used a big fat tapestry needle
- Paper, card or cardboard. I used regular printer paper for my smaller balls, watercolor paper for my larger ones and also an the cardboard from a cereal packet.
- Tape
- Template– see below
- Paint or pens to decorate
The Template
Download the template below.
***Update***
I now offer a free Cricut template you can download to use a Cricut machine to doo all that cutting and scoring for you! CLICK HERE to download
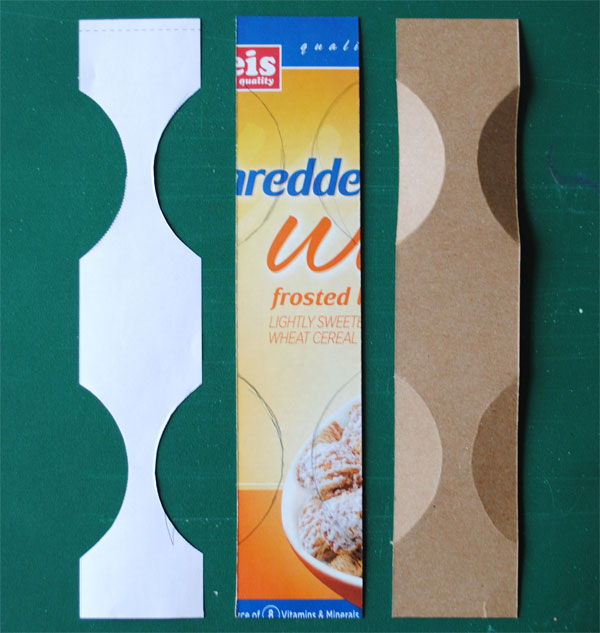
If you are using paper or thin card stock to create your orb you can print straight onto your substrate and cut them out. For anything you can’t feed through your printer you will need to make a simple template to trace around. When making a template cut out the areas that are to be scored as shown below.
The template can be easily scaled so you can make different size orbs.
Making the Orb
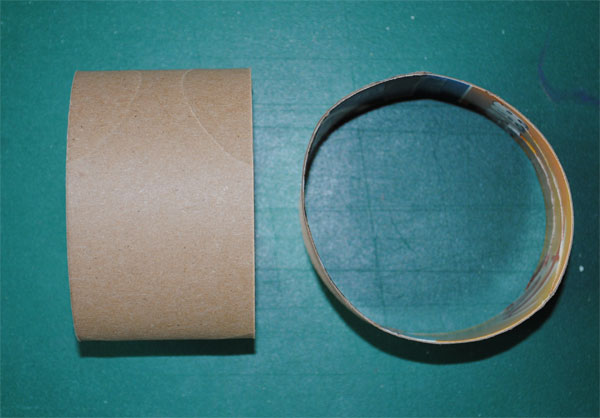
The orb is made of three strips. Cut out each strip and score along the small dotty lines. Once scored gently fold as shown.
Then flatten out the folds you have made.
Tape two of the strips to make circles, if you are using a pre-printed stock there is a dotted line to help you line the seam up.
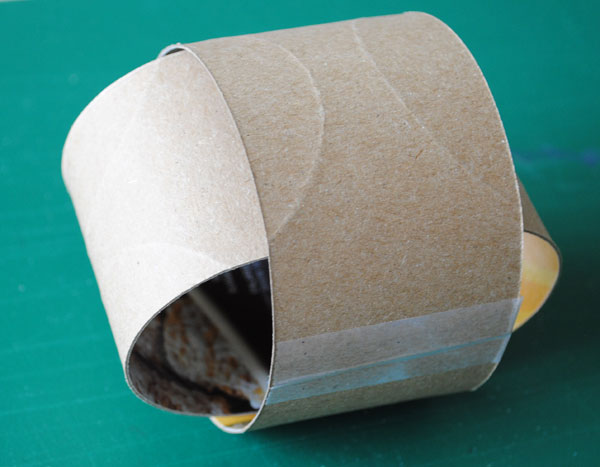
Combine your taped pieces as shown. You want to make sure that the scored areas are completely visible
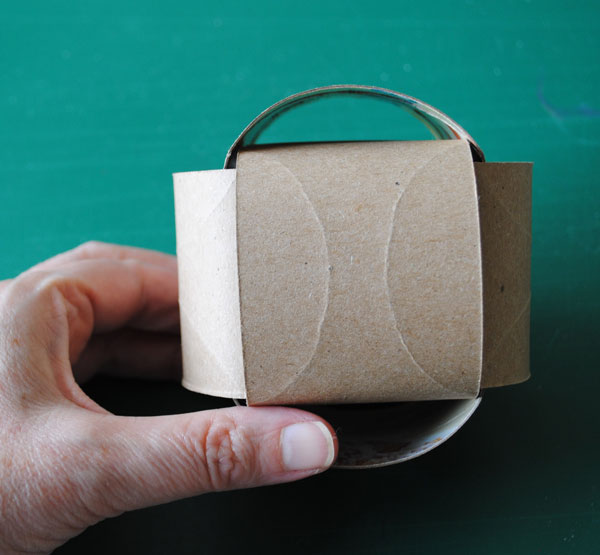
Then take your final strip and thread it through like this

Tape the ends together and rotate if gently to make sure the scored areas are visible.
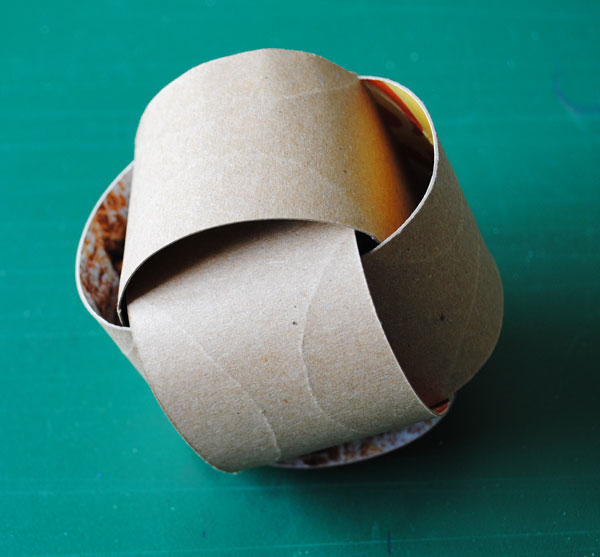
Then gently push on the scored areas to activate your folds and work your way around the orb. I found working on a side then the opposite side worked best.

Then you can decorate however you like.
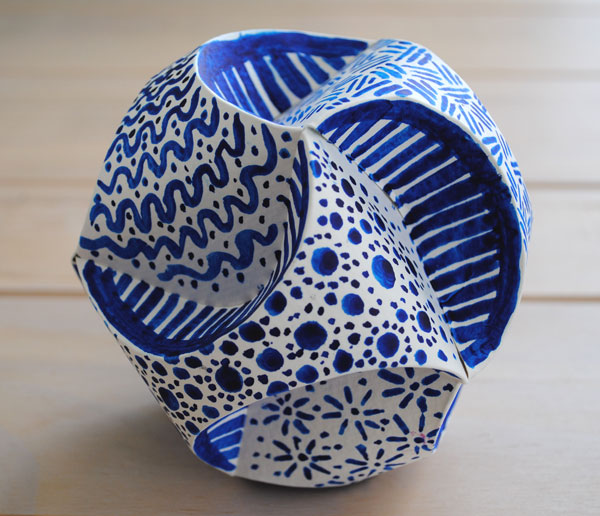
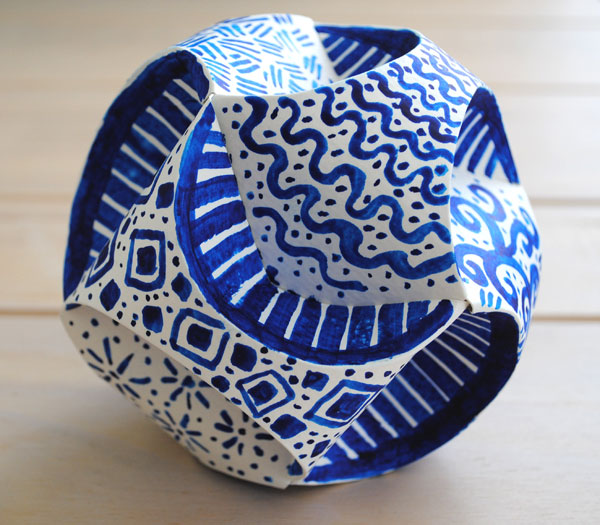
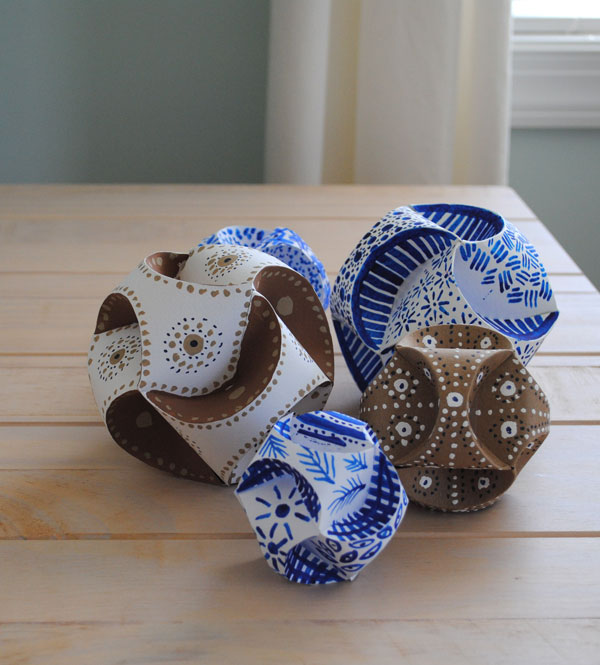
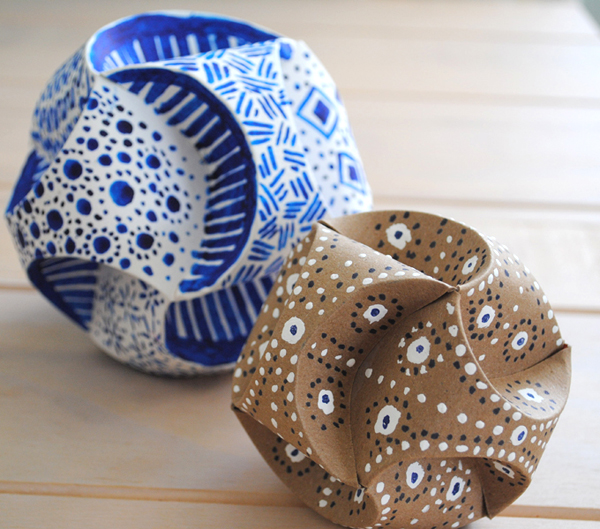
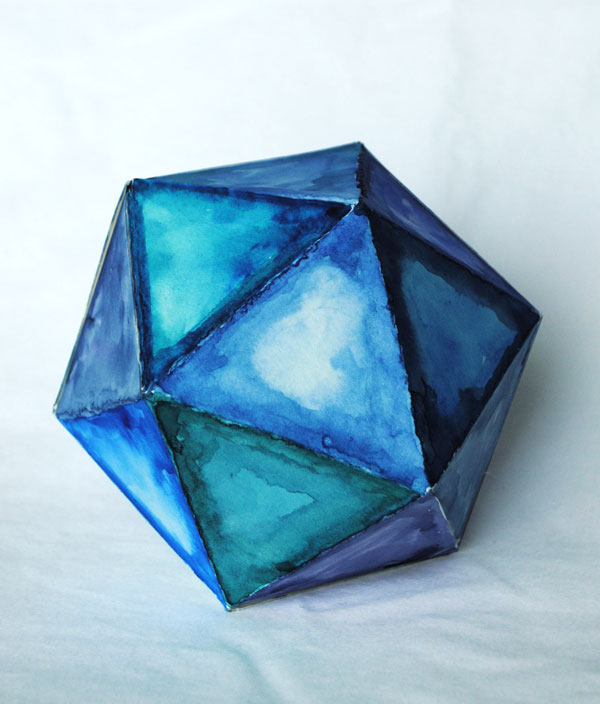
I used water color paint and paper for this blue one painting different patterns on each outer edges but tying it altogether with a simple stripe patternon all the other areas
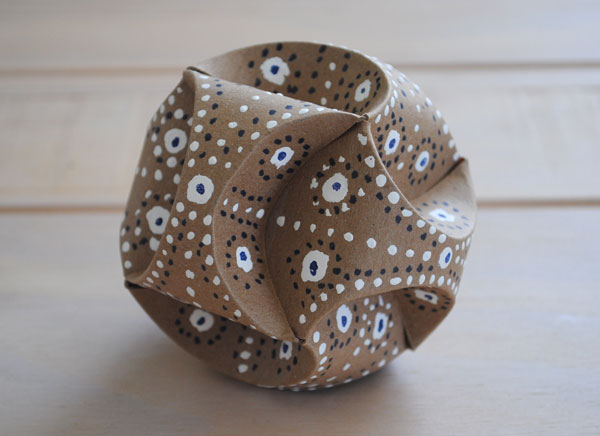
This one started life as a cereal packet and was decorated using white acrylic paint and a navy sharpie marker.
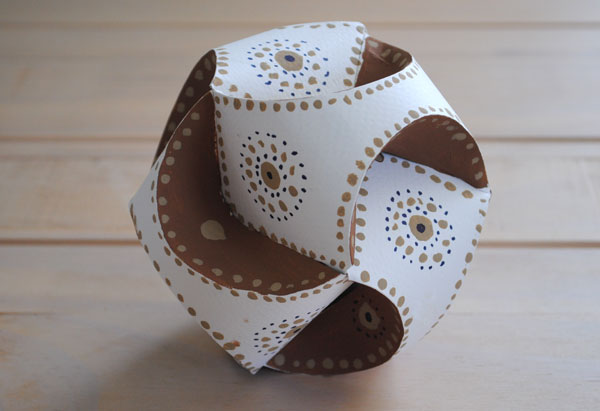
Here is another one made from the cover of my watercolor pad… why waste a perfectly good piece of substrate! I used acrylic paint and a sharpie marker.
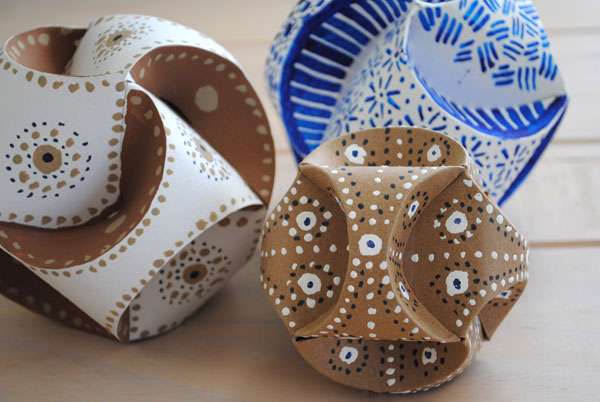
They look lovely just together on a side table
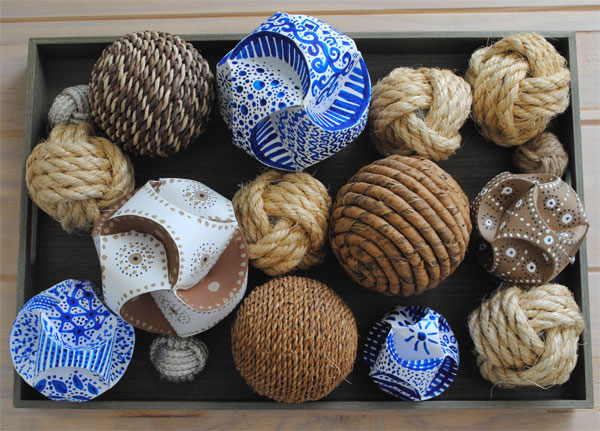
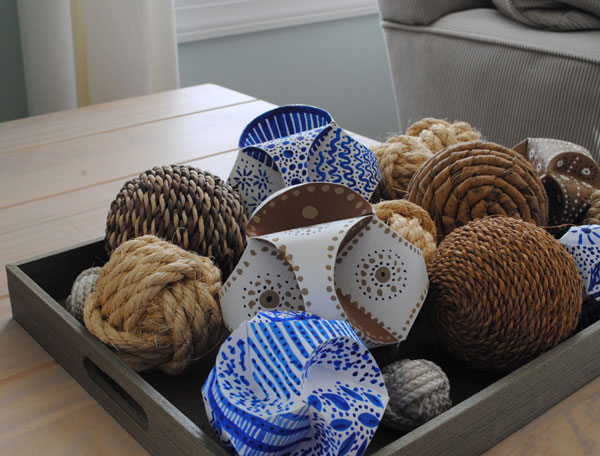
or added to my collection of decorative balls.
Here is a fun video where one of my readers used my template to make an orb. It shows how super easy these are!
Enjoy!
Love from
Creative in Chicago
XX
P.s if you enjoyed this post then you are going to love this post too where you can download a free template to make an Icosahedron – that’s a 20 sided shape.
These are so cool! I’m always looking for ways to upcycle (because who doesn’t want free craft supplies?) so I love that the largest was made from a cereal box!
Glad you enjoyed Natasha, I am all for free stuff too…making treasure from trash!
I can’t get the template to download. Help! Going to be on airplanes with preteens over Spring Break and I am sure they would LOVE making/decorating these.
Here is the direct link
https://vco.lkt.temporary.site/wp-content/uploads/2017/07/paper-orb-template-creative-in-chicago.pdf
Yes! Thank you!! I’m going to start making these right away!!
hey Natasha, you inspired me to create a new category on my blog and write a post about it!
https://vco.lkt.temporary.site/2017/07/trash-to-treasure.html
Oooh! Guess what I’m going to be making this Easter! Thank you for sharing!
“
hi my name is Aaron i am making a paper orb today and let konw how you made it?
These are amazing. Thank you so much for sharing.
This are so awesome and unique! Thanks so much for sharing!
These are incredibly original and beautiful! Thank you so much for a very clear tutorial.
My pleasure Karen!
How fab! I shall be making this while working as a volunteer at a addiction recovery centre.
Very therapeutic!
Question … you cut the semicircles out of one strip, and fold the other two? Just want to make sure I know how to do it … going to try it with my 7 and 5 year old later today. Thanks!
Hi Shelia,
You don’t actually cut semi circles out of any of the strips. If you are using a thick substrate such as cardboard I suggest making a template… the template would require cutting. Hope that help and have fun making these!
oh that clears it up 🙂 Thank you!!
Too bad I didn’t read this question and answer before trying this out. The picture of the three strips is really and the explanation of why one strip is cut out would be helpful right above or below the actual picture. Back to the drawing board for me …
Fixed that by adding a caption to photo, you are right it was a bit confusing!
how long and how wide do you make your strips?
Thank you for this wonderful tutorial. I teach art at a school where I only get a tiny budget. My students are going to love this.
My pleasure Maxine. Send me a photo a your students effort!
Excelent work! Thank you for sharing!
These are beautiful ❤️. If I’m not able to print out a template is there a way to make my own? I’m disabled so I don’t get out much, and not text Savvy at all ☺️ by the way I too am from Chicago, actually Evanston. What now in North Carolina. I miss men’s Pizza in Evanston so much ☺️ have a beautiful day.
If you can’t print out you could always hold a thin piece of paper up to the template on your screen and do a simple trace. I am not actually from Chicago at all but have been living here on and off since 2010. I am originally from the UK!
For those of us who can’t print the template, could you give us the strip dimensions and the height, width, and general placement of the circles (ex: 2 inches from bottom)? Very cute
I’d recommend just putting a piece of paper up to your monitor and tracing the template. I could get all mathematical on you and it would be complicated. Tracing is easier!
I’ve been making origami stars and trees and decided to try these. They are my new favorite thing to make with paper now. Thanks so much for the template and very clear instructions!
I have some questions about this craft! I really love it and want to make some. Will you please send me your email so I can contact you? debsegler@gmail.com
You can contact me at z.feast@indigoimage.com
I am having trouble making these. I think the paper I am using is too thin. I am from Chicago. My daughter lives in the UK. I am going to try it again tomorrow.
You need a weight of paper that when scored will hold it’s shape. I used cardboard and a heavy weight watercolor paper to make mine. Where about in Chicago are you?
It is working now. I used scrape book paper over light weight card stock. Grew up in South Shore; livre in south subs now, Daughter lives in Kent. Small world.
Is there a possibility that you could send the dimensions of the template and it’s inside measurements. I am living in Colombia (country) and have only a phone to work from.
Just came upon these ornaments! They are beautiful! Great way to use scrapbook paper and my stash! From Omaha, NE.
Just made one of these ornaments. I used a fancy pen to make designs before assembling it. Turned out great. How do you adjust the pattern to make smaller orbs ?
From Mansfield,CT
I finally made one. I made it from the box that held a frozen pizza. My cereal box was not large enough for the pattern. I would suggest you re-word the instructions at the second picture after the template. ( After joining two strips to make one circle, I found that something was not right.) Perhaps you could say, ” Join the ends of one strip to make a circle. Repeat with the second strip so you have 2 circles. ” “Don’t join the ends of the third strip until it has been inserted as shown in the picture.”
Now my orb looks like your picture. Thank you. I am going to share this craft with my friends as I am sure their children are going to need something to keep them busy while our schools are closed.
When scoring, do I do it on the side that will show, or the one that won’t show? Would there be a problem if the decorating was done before assembly?
I doesn’t really matter what side you score on and as long as you are not too aggressive with your scoring it will not affect the decorating at all!
To Creative in Chicago, hi. Thank you so much, so very much for sharing your beautiful creations with us. I am Nanny, now I will be “cool Nanny”, I can’t wait to play and create. I am going to purchase a printer to do so. Hugs from ” cool Nanny in Australia. ” Sherie
Why thank you cool nanny, enjoy your creations!
These all are all so cool!!!:D I wish I could do this…..:(((
That is wonderful, I will use it to teach 2d and 3d for my junior students. Thank you, my kids will love it.
Not only do I love it, but so does my 7 week old kitten!
I thought I could make cat toys with this, once your cat is a little older, I bet you could add catnip inside. They say kittens don’t react to catnip till they are around a year .
Love making these and would like to make some smaller ones. How do I adjust the pattern for different sizes?
Thanks from Nova Scotia Canada!
The easiest way is to scale the template using your printer settings when you print it
Do you think this would work with fabric with a heavy stabilizer on the back?
I think it would need to be a pretty hefty stabilizer but would be fabulous if you could get it to work and open up so many design possibilities!
Just found this website and just love it! Already tried the paper orb and am looking forward to decorating it. Next I intend to attempt the petal votive bowls.
Thanks so much for sharing.
Zahra
they are so pretty that it looks so hard but it isnt :-). soooo nice
I made a few of these a few years ago and misplaced my template. So happy to find one here. However, I wasn’t able to link to a downloaded template. Could you please email it to me?
How long and wide are the initial strips of paper in inches?°
It really does depend on the size you want to create
Thanks for your post sharing your beautiful work. Have you ever tried drawing on the parts before assembly? Do you think this would work.
Thanks
Winnend
Hello there.
I was wondering if you could help with this project? For some reason, I can’t get the download to work and would really like to make this paper orb.
Would be grateful for your help.
Wishing you a wonderful Christmas.
Best wishes,
Chris
I can’t find where you’re supposed to download the template for this Orb. Can you email it to me?
This link
https://vco.lkt.temporary.site/wp-content/uploads/2017/07/paper-orb-template-creative-in-chicago.pdf
Wow! This is the second time I have made these and I love them!! I bought some white and gold paper from Michael’s after the holidays for about $.50 a page. I made nice of them for my daughter to go in a lovely gold and white bowl I bught her for Christmas. They are so beautiful!! Your instructions are well written and easy to follow. This does take some work, but I feel so accomplished when I finish. Thank you for this!!
I have been using these since 2018 with my 4th grade class when I was looking for art ideas. The students love these and I love it because it is such a different type of art project. The 3-D aspect makes it fun. I use it as a winter craft aka snowballs with cool colors and fun patterns
Absolutely ingenious!
I have tried this over and over so I can teach this to my high school craft class but fail every time. Whenever I get to sliding the 3rd piece in it never seems long enough to attach. I am using equal length pieces of card stock. Is this easier with a cardboard cereal box or paper? Is it easier smaller scale or very large with chip board? Thanks for the advise.
I love these, and I have made several with a craft group, I was wondering if there is anywhere that you can purchase a metal die cut for the template as I think this would be a great asset to the craft group, thanks again for the inspiration Jacqui xx
just made these orbs with high school kids at a special school. i prescored the arcs, but otherwise let them do their thing. Thye LOVED them! They asked me for more templates so they can make more.
thank you so so so much!
Your student might like these
https://vco.lkt.temporary.site/2019/06/icosahedron-decor.html
I would practice making the orb first! In case your first one doesn’t turn out so well…you won’t have wasted time decorating it.
What type of glue or tape do you recommend? I tried a glue runner (permanent glue) and I’ve tried clear tape. I was making the pieces from a cereal box.
I used just regular gift wrapping tape
These are sweet! I’ve never seen them before, I downloaded your template, thank you for sharing and teaching! Great idea!
Kudzu
Just made 3 of these and got it all figured out. Great instructions and ideas. Love looking at these and had to figure out how it was done – thank you for sharing. I used scrap booking papers and is so sturdy. I’ll get faster now that I know more. Always fun to try something new and so interesting! Thank you!
Thank you very much for this georgeous decoration so easy and funny to make.
these are so pretty. thank-you for sharing your method! I was thinking to try with strips of paper 3” x 12”
I cannot express in words the gratitude I have for this comparatively simple paper orb. I have been trying to get my nerve up to dive into Bradford Hansen-Smith’s Folding The Circle/Geometry of Whole Movement- – the work is fascinating but…intimidating to this paper folding novice.
I’m going to try this asap. Thank you!