
Sewing tutorial for beginners!
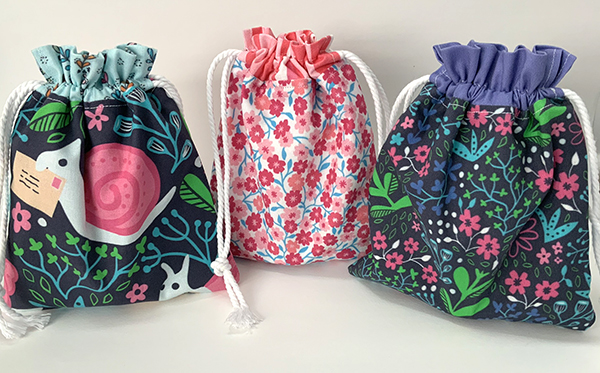
Am in seriously into designing fabrics these days and sell mostly on Spoonflower under the user name Creativeinchi. Up until now I was required to buy a small sample of every design I uploaded in order to make it for sale. That has now changed but it has left me with a load of small samples of my fabric.
They have sat fold neatly in a box for ages but I recently came up with an idea of what to make with them. This easy sewing tutorial for beginners will have you sewing along in no time!
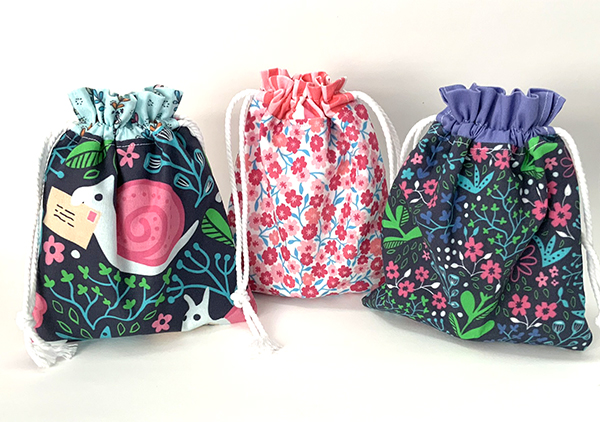
Easy Sewing Project: How to make a Draw String Bag
You will need
- Sewing machine
- Scissors
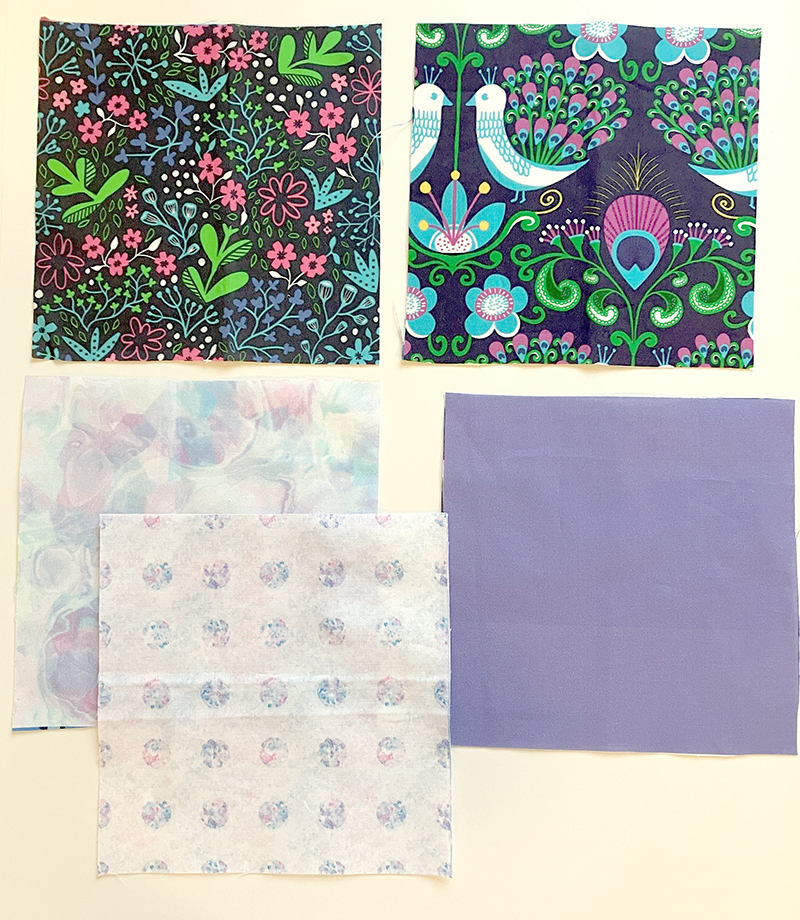
- 5 squares of fabric, Mine measured 5″ by 5″ but really any size will work
- Macrame cord.
Getting Started
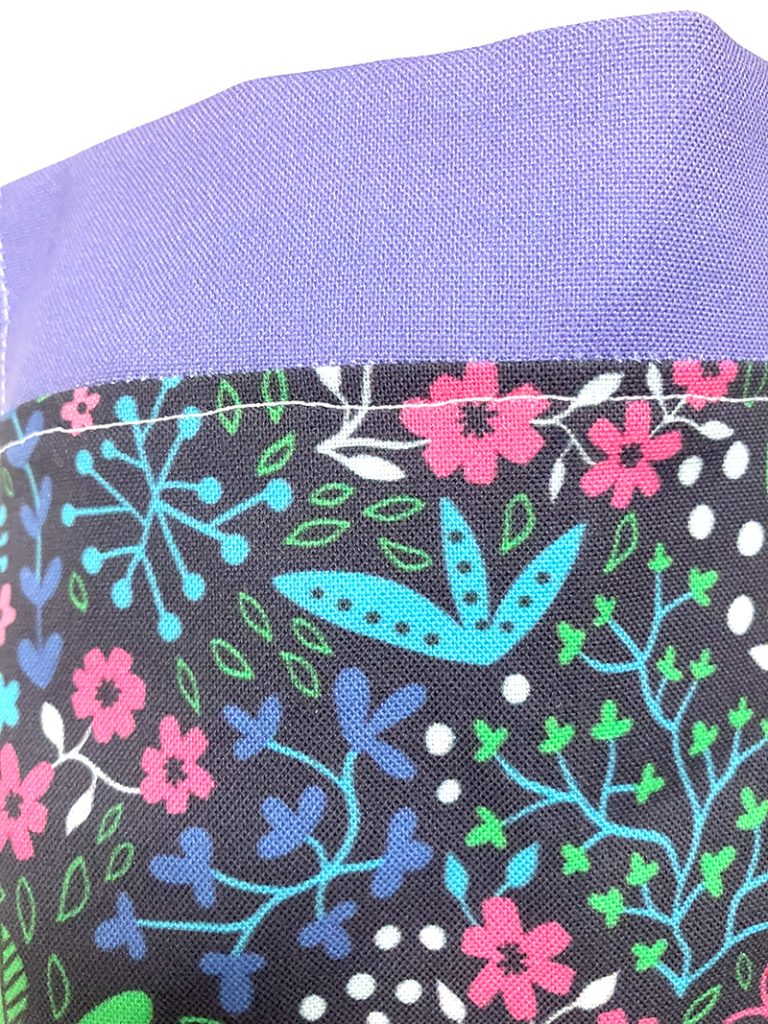
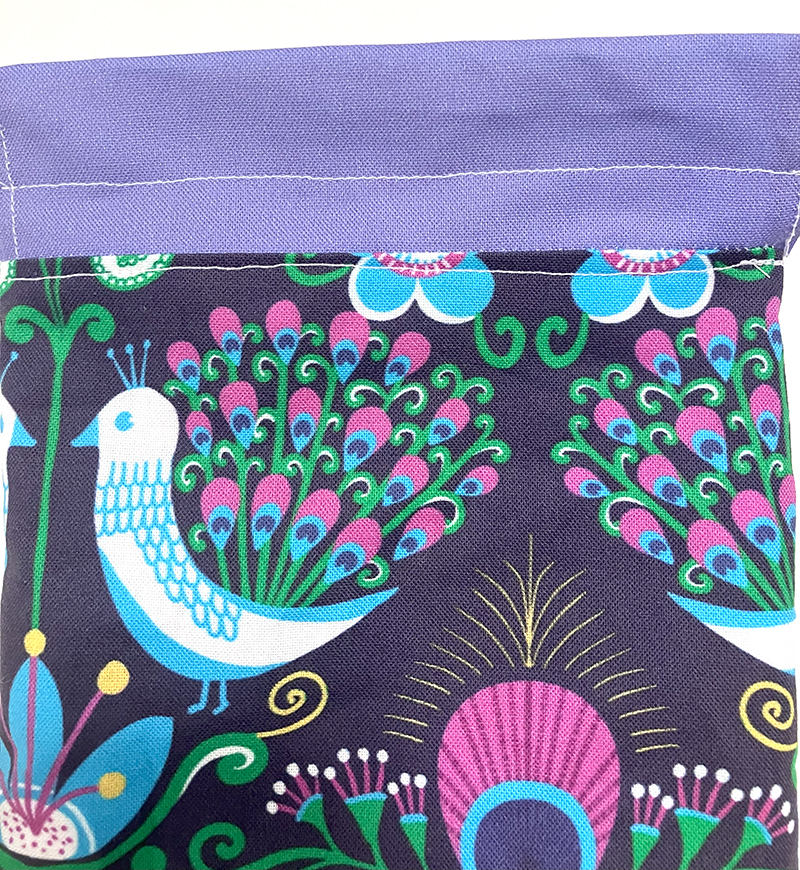
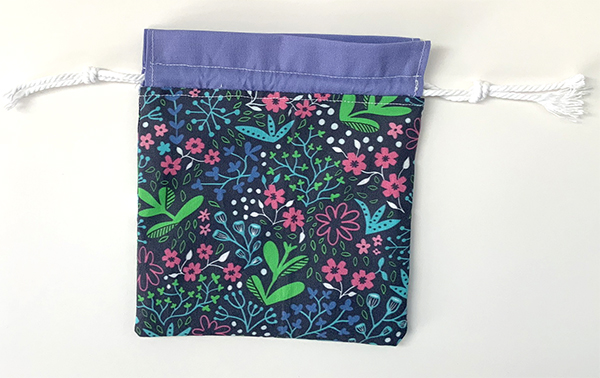
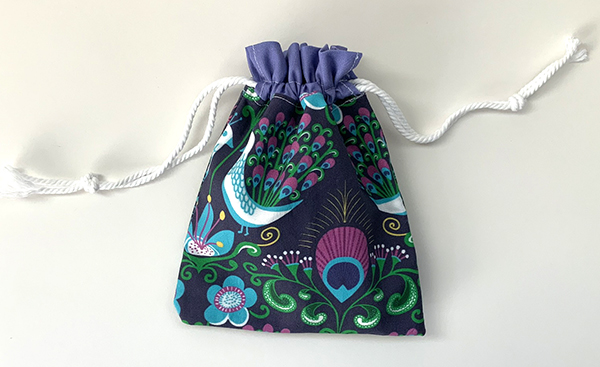
Start by cutting out your fabric. In the fabric below the two darker ones are for the outside of the bag, the two lighter are for the inside of the bag and the purple square is for the tab top. You can use a mix of designs like me or the same design throughout!
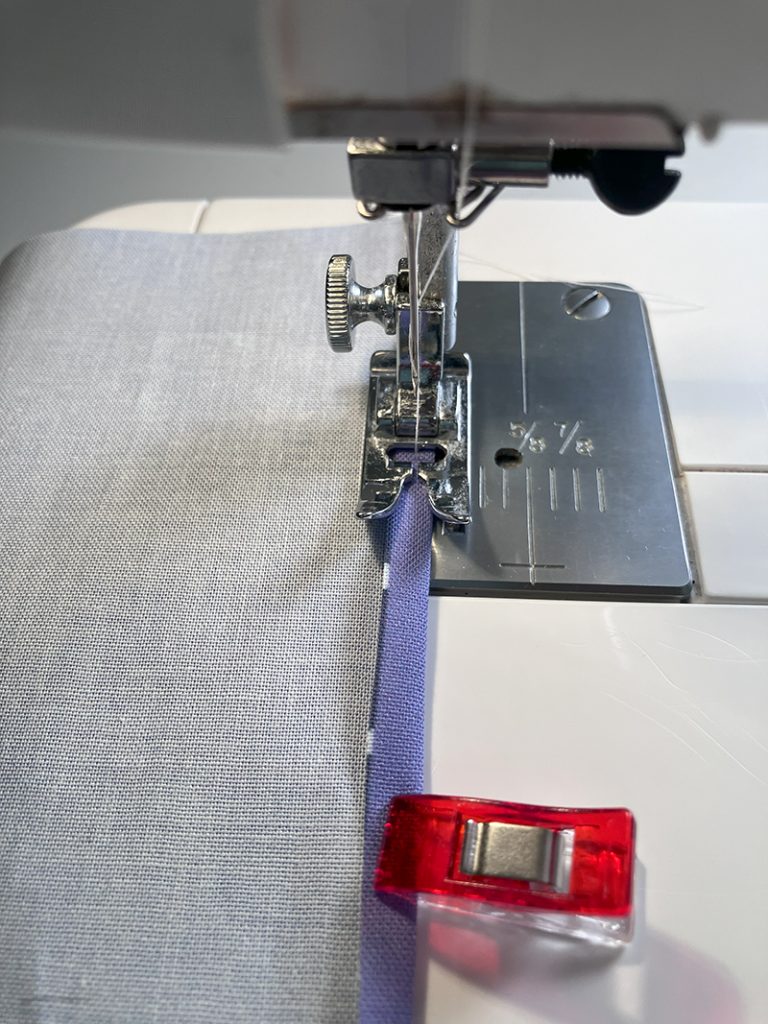
Prepare the tab
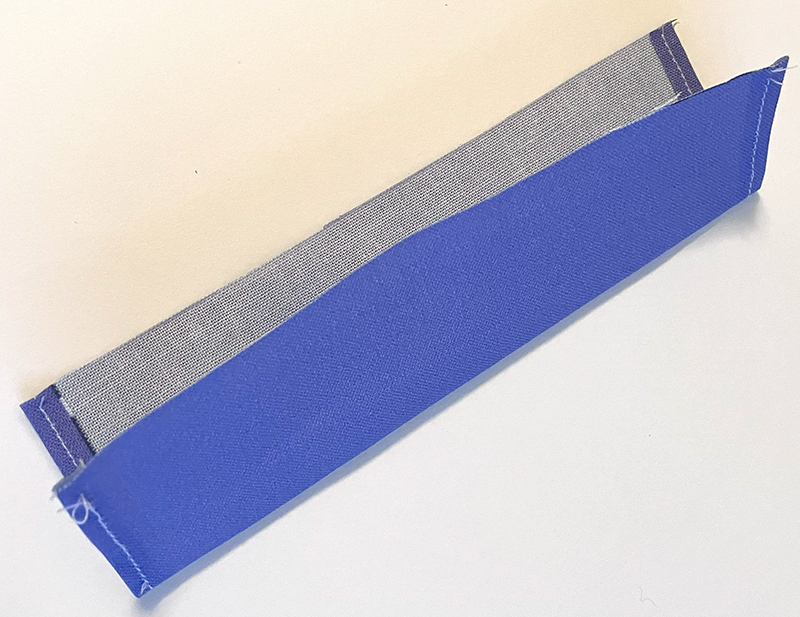
Cut the tab square in half so you are left with two rectangles. Finger press the short ends of each rectangle so each has a 1/4″ hem and sew into place. Fold the hemmed tabs in half.
Adding the Tabs
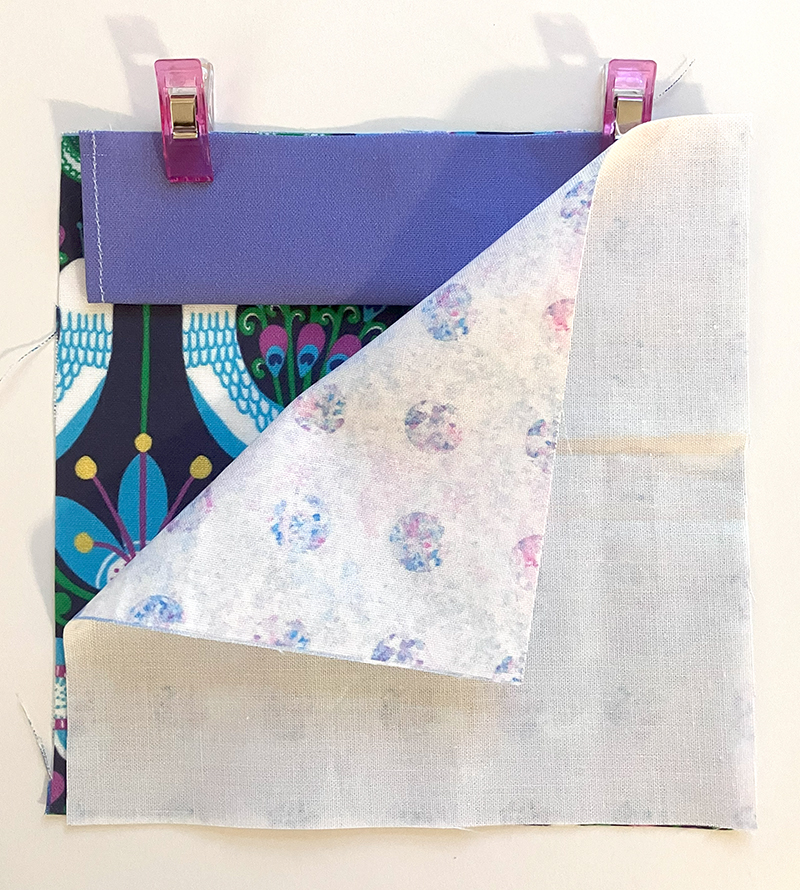
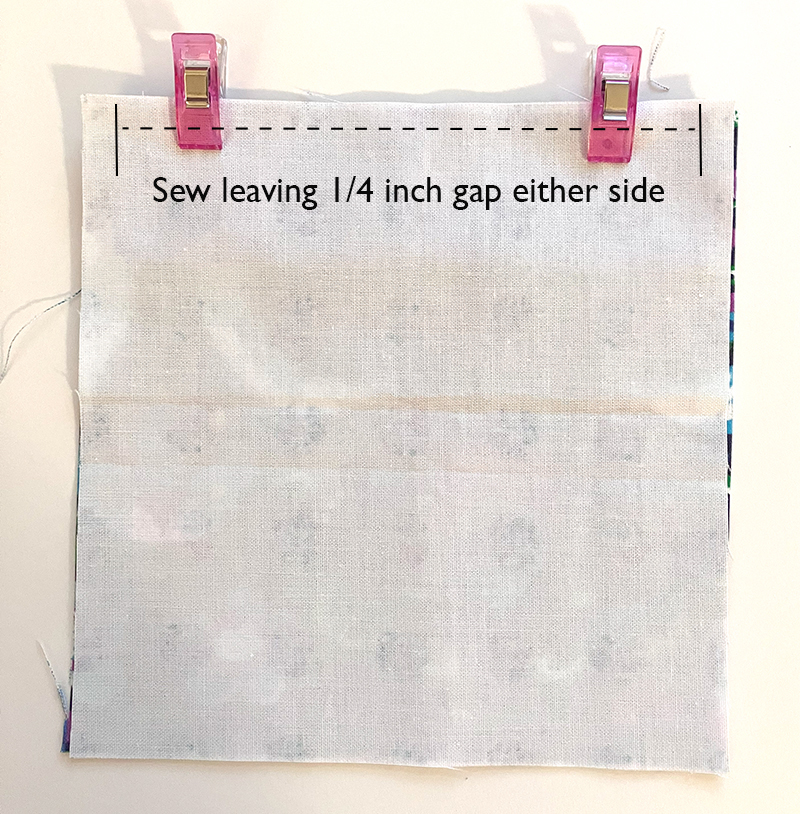
Take one of your outer squares right side up, center the tab and pin into place. Then take a lining square, wrong side up line up and pin in place so you have essentially sandwiched the tab. Sew in place leaving a 1/4 gap either side. Repeat with you other squares.

Sewing together
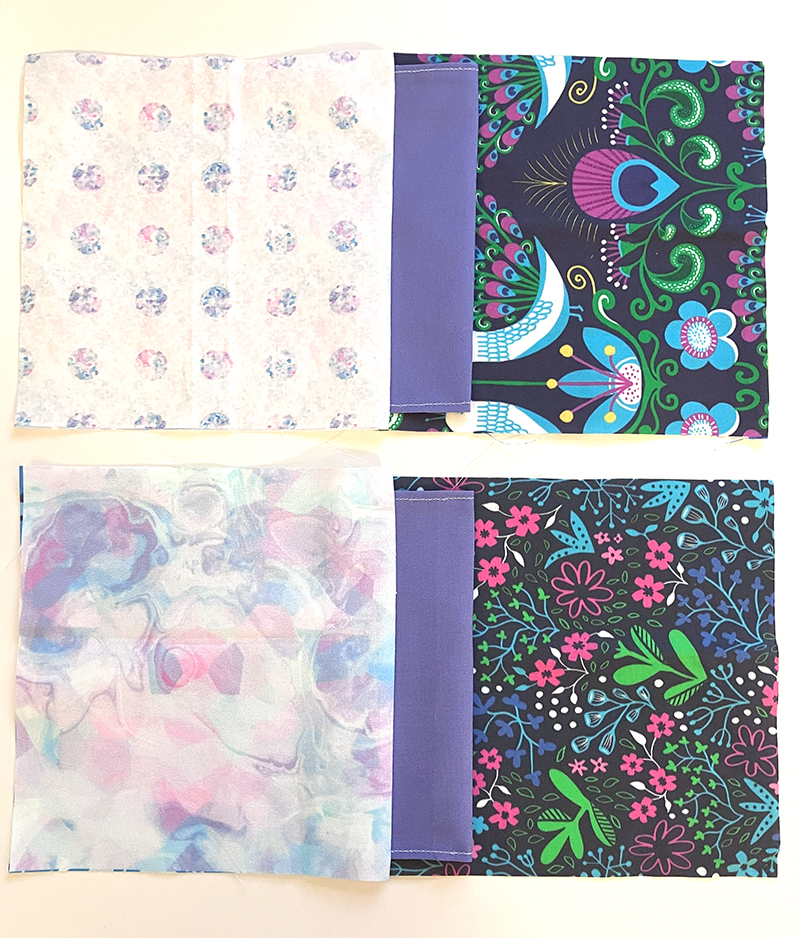
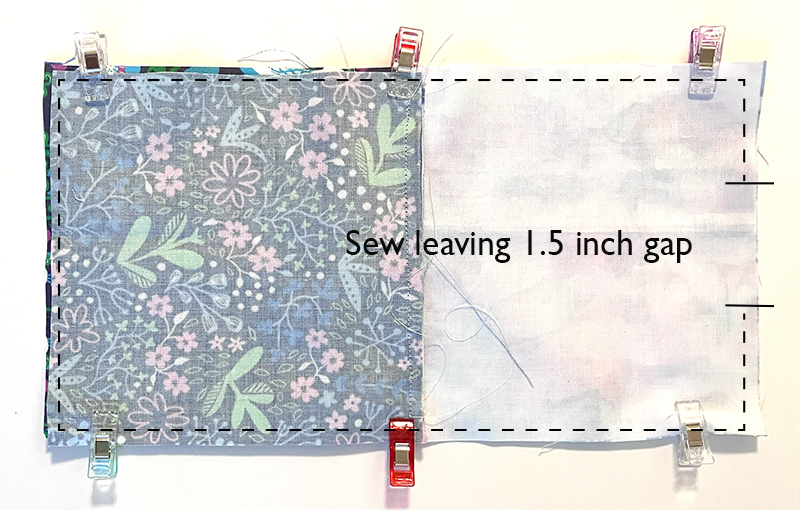
Open up and press each side of the bag making sure the tab top lies towards the outer designs. Pin the two pieces right sides together ensuring the outer designs are facing one another. Sew around leaving a 1.5″ gap on the lining part.
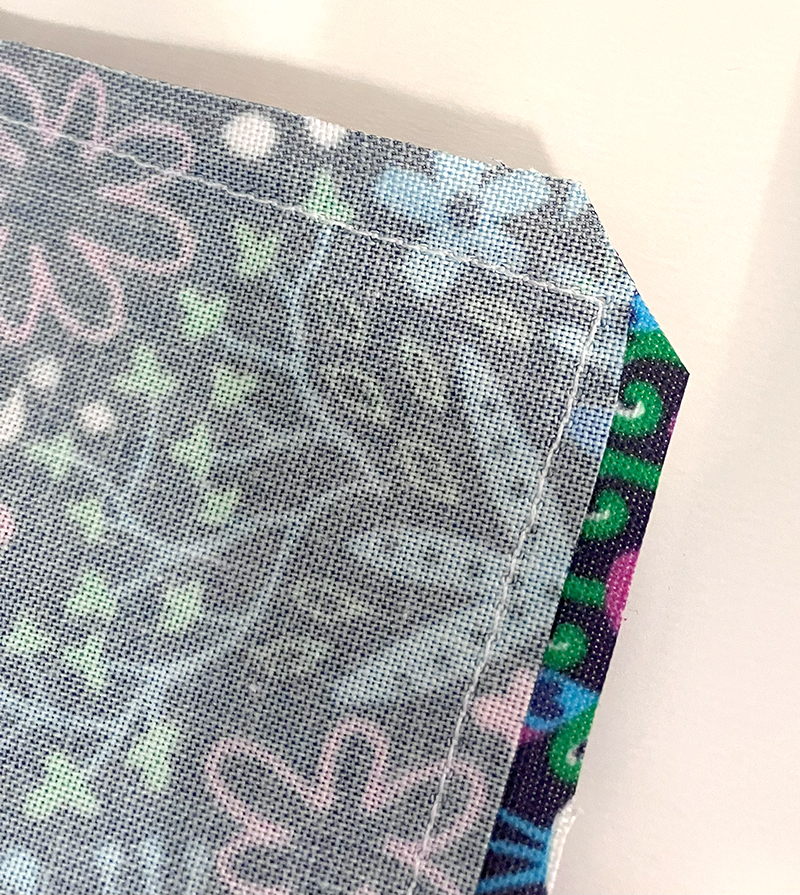
Snip each corner as show and turn inside out! Poke out the corners.
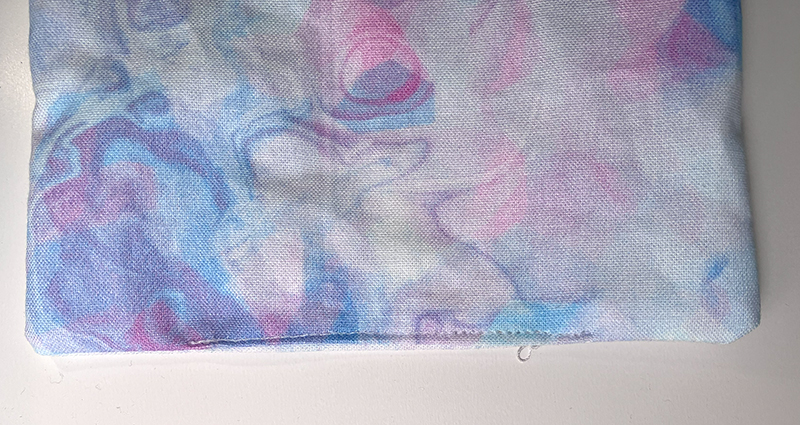
Close the gap in the lining by sewing a short line.
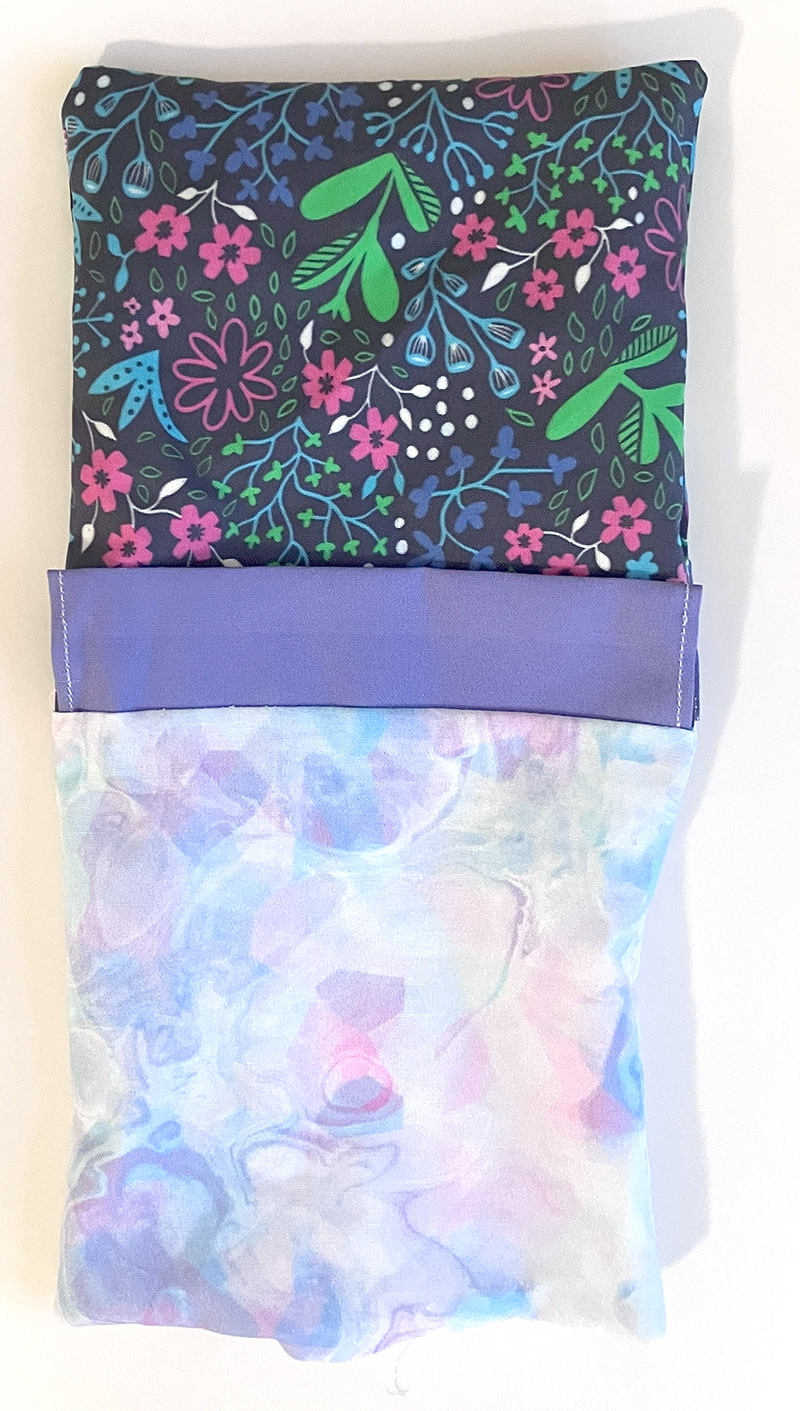
Push the lining into the bag and give the whole thing a good press.
Add a line of top stitching just underneath the tab and create a channel in the tabs by sewing a line of stiches half way up each tab.
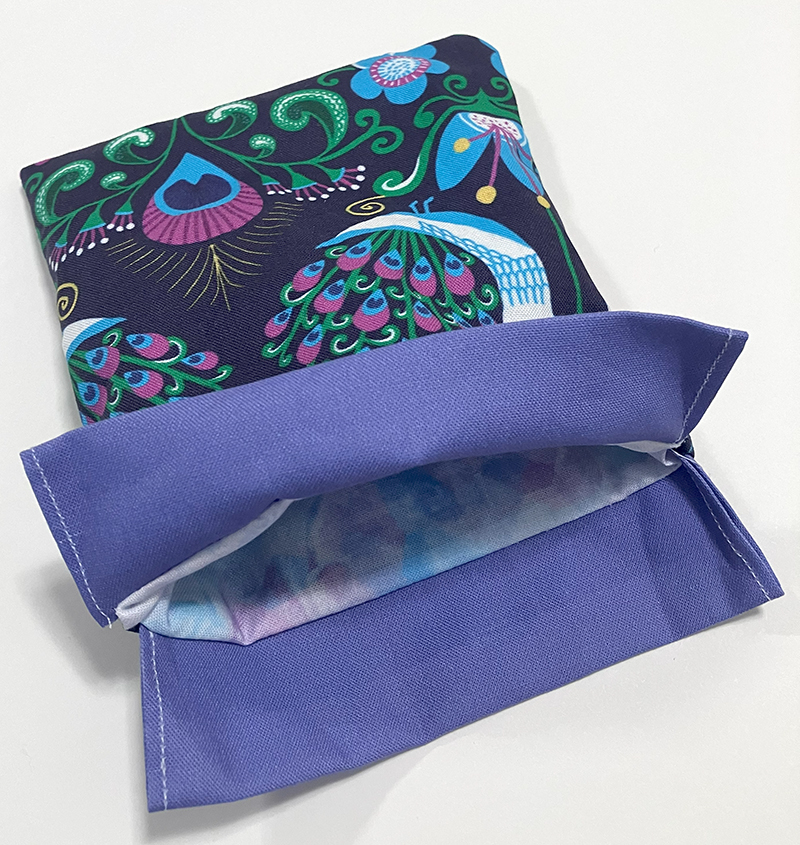
Adding the Cord
Cut two 12″ lengths of macramé cord and. Thread the first one through the channel so both raw ends are on the second length so bot raw ends are on the left. Knot the raw ends together.
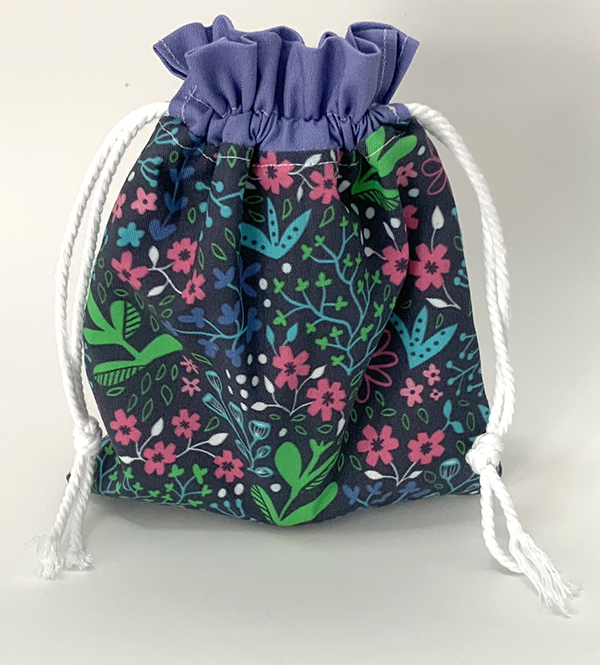
such a fun sewing tutorial for beginners!
Interested in more Sewing tutorials and all things fabric?