
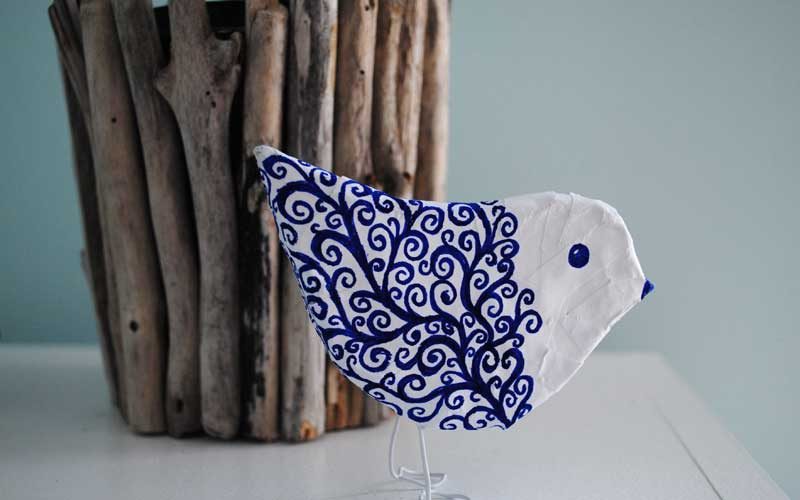
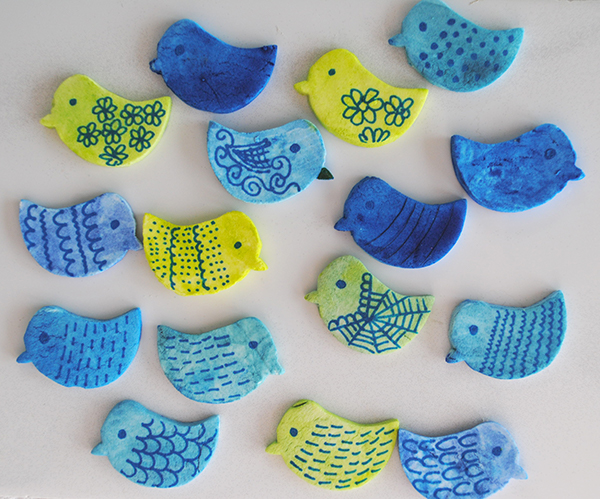
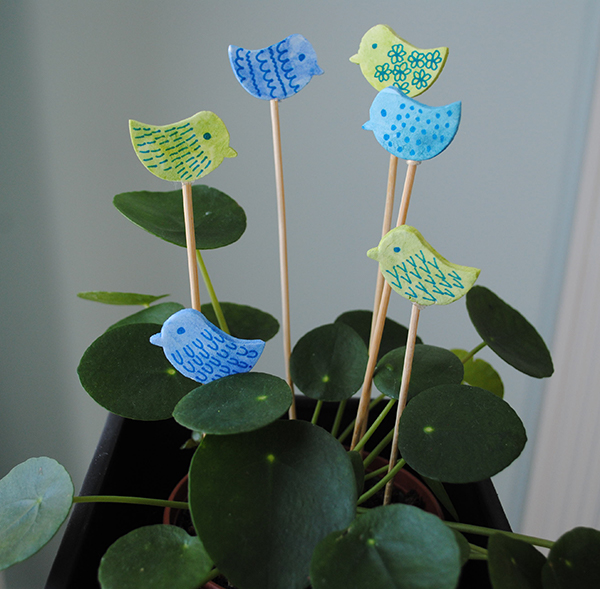
Spring is in the air and the birds are chirping, but not this one sat next to my driftwood planter. He is made of paper mache (or is it papier mache?) so it would be a bit weird if he could chirp!
Want to make one too? A little flock would look great on spring themed mantle piece.
You will need
- Corrugated cardboard
- Bird template
- 2 Paper clips
- Hot glue gun
- White glue such as Elmers diluted with water – about a 1 parts glue to 3 parts water
- Paper strips
Start by downloading our free printable bird template. You can print it out to scale or enlarge for a bigger bird. Cut out the shapes and use them to draw the bird form onto cardboard.

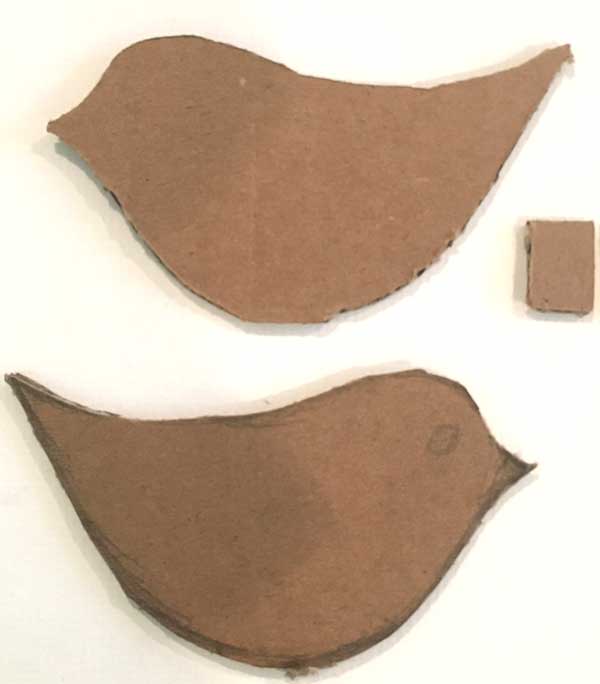
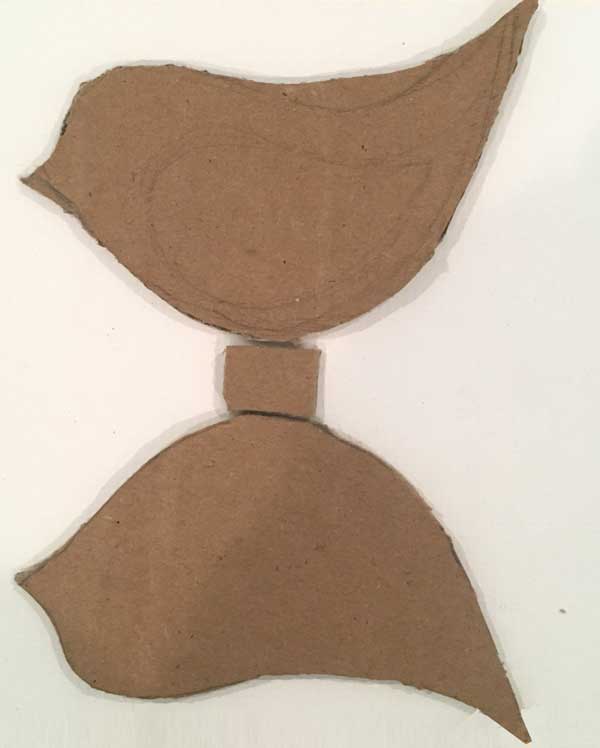
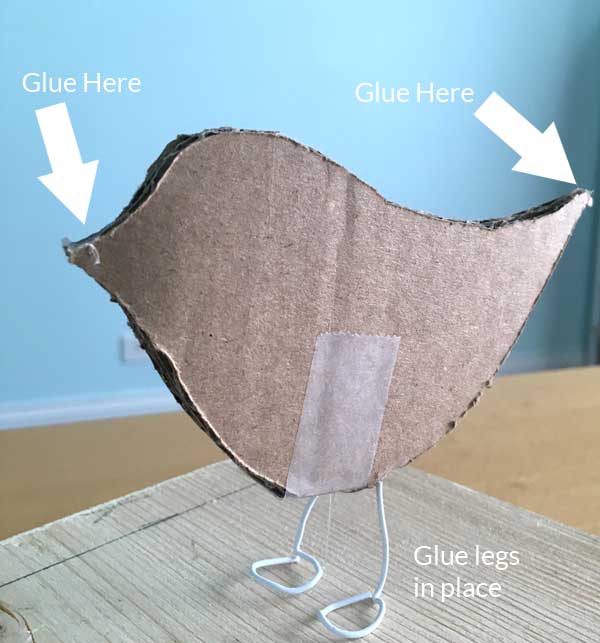
Using a bit of tape, stick the small rectangle of cardboard between the two bird shapes as shown below.
Take the paperclips and bend them into the following shapes
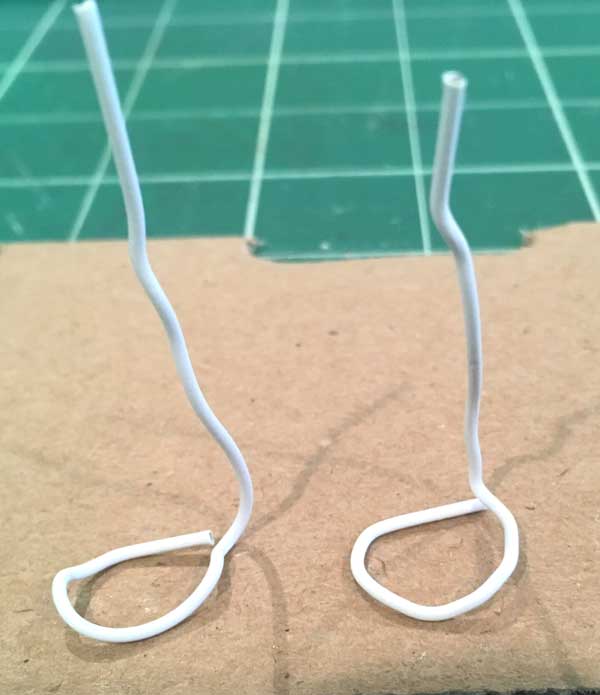
Then fold together the bird shapes and use a little dab of hot glue in the beak and tail areas to hold the shape together. Also glue the legs in place. I found sliding the paperclips into the corrugated area of the cardboard the easiest way to get them to stay exactly where you want them.
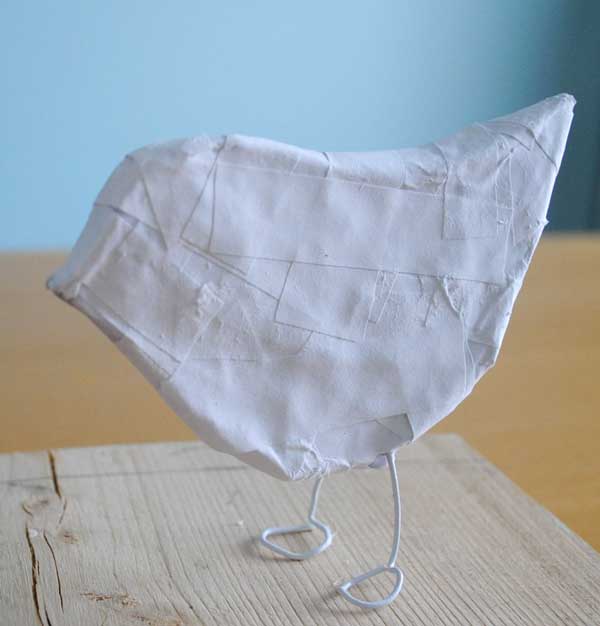
Cut up some strips of junk paper and mix up your glue. Cover your sweet cardboard bird with a couple of layers of paper mache and leave to dry. Bit scruffy but not to worry!
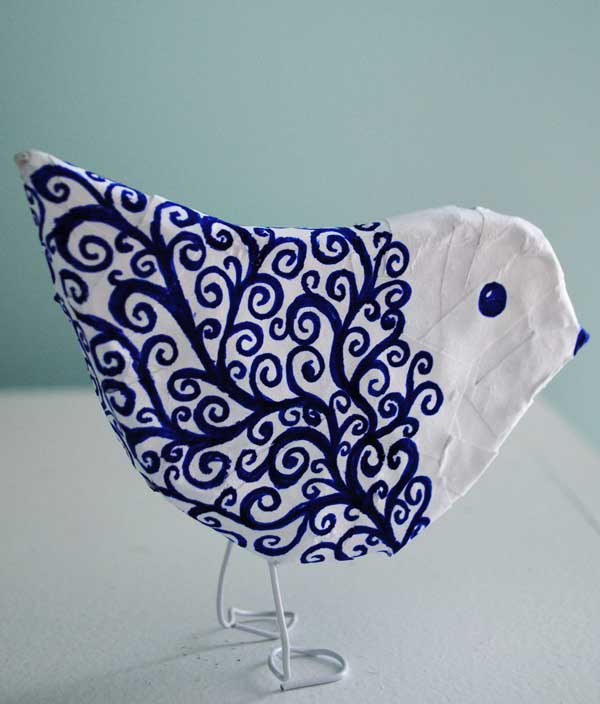
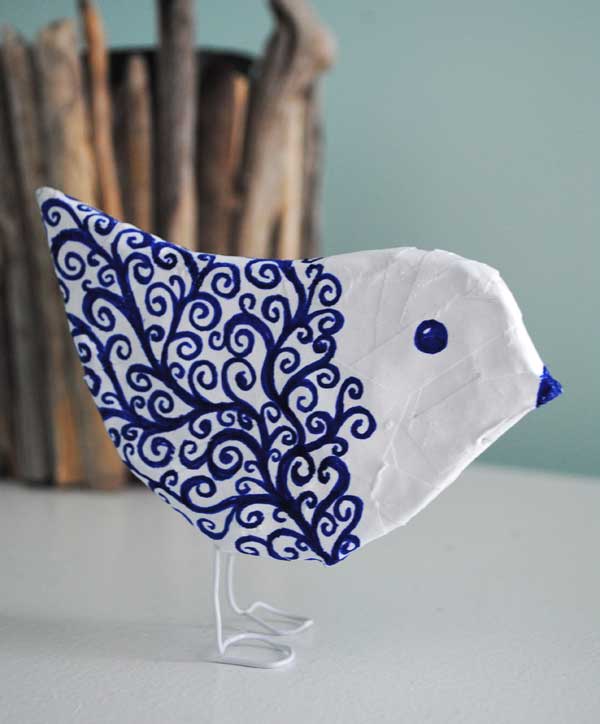
Then decorate. I used a fine tipped blue marker a drew a swirly pattern but you could go crazy here and do what ever make you feel happy that the days of polar vortex hell are behind us ( at least for this year!)
Enjoy!
Love from
Creative in Chicago
XX
P.s If you enjoyed this project here are some more sweet birds you can make
Very cute and simple to make
Muito fofo! Fiz e ficou bonito também, obrigada por compartilhar
I have been looking for something to do with a group of 6-11 year olds this will be great
OMgosh I am 70! And thought it would be something for my window sill!
Iloved this Idea. Thanks!
How absolutely darling! Perfect for making with the children. Thank you so much!
Fun and nicely presented.
Hi there,
I made me one.. I just left mine white!
It was sooo fun and easy making one it!
Wish I could show you the pic!
It turned out just great
Can I link to my Google Classroom for my 5th and 6th grade students? I’m an elementary art teacher working to put together online resources as a result of our schools being closed during this time. Thanks!
Absolutely, I have lots of resources for kids and am going to be making some updates to the site this week which will enable kids find age appropriate projects a little easier!
Hi Jessica,
I have just put together a Kid Friendly Craft projects
https://vco.lkt.temporary.site/category/kid-friendly-craft-projects
Another site your student may like is – Secret Messages for Kids
https://www.indigoimage.com/secretmsg/
I love all of this!
It was so cute and fun to make
I love it. But i don’t understand how the small rectangle goes.
Thanks
The small rectangle is taped between the bottom edges… it give dimension to what would otherwise be a flat bird!
Did you know one can do print screen?
Really cute! Excited to start following your blog! Thank you.
Loved the bird pattern
Beautiful and easy bird to make. Thank you very much for this idea.
Thank you, that’s brilliant, I know a bird lover who would appreciate such lovely diy present!
I just love to work with cardboard, scissors, glue and paper!!! I love this cute birds!!! Thanks for sharing it!!!!
So so cute, can’t wait to make a flock of these adorable birdies!!
Very cute project
I love this! It’s so fun. I would love to make this with my 6-11 year olds in my library crafts session. How long does it take for the papier mache to dry?
best to leave it for 24 hrs
Hi, I looooove this idea. Going to make one soon. In decoupage crafts they tear the edges so each one blends better than cut edges. I would assume it would work with this application. Kids would love tearing the paper . It would also save the parent and teacher scissor work. Just an idea
Fabulous must try these